Recreating Interview Coder on Linux
Published: August 10, 2025
The Challenge: Making Transparent Overlays Work on Linux
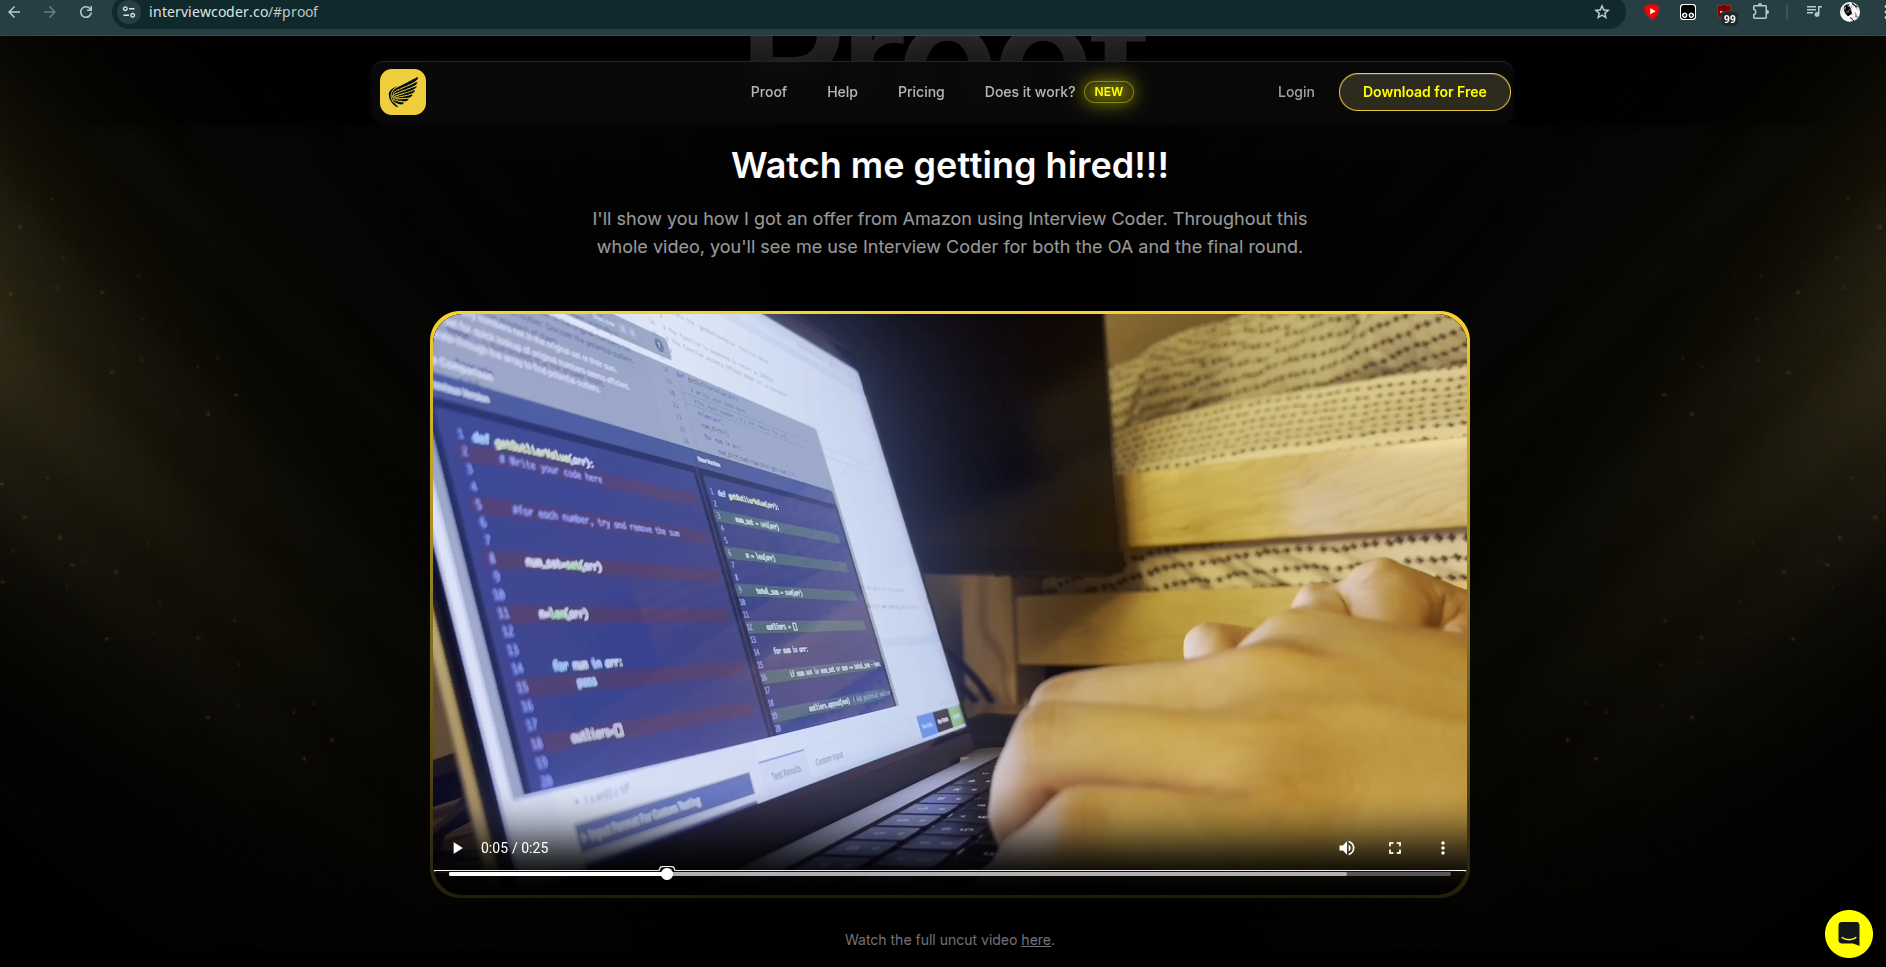
When I stumbled upon the viral InterviewCoder.co, a $25/month AI-powered interview assistant that promised to be "invisible during screen sharing" and help developers "ace coding interviews without grinding 500 Leetcode problems," I couldn't help but wonder: how hard could it be to build something similar? It can't be that hard, why would anyone pay $25 for this?
The Motivation: Curiosity Meets Practicality
This project was born from two main drivers:
- Pure Curiosity: I was genuinely curious about how quickly something like this could be implemented using modern AI tools like Claude Code. Could I re-create a commercial product in just a few hours?
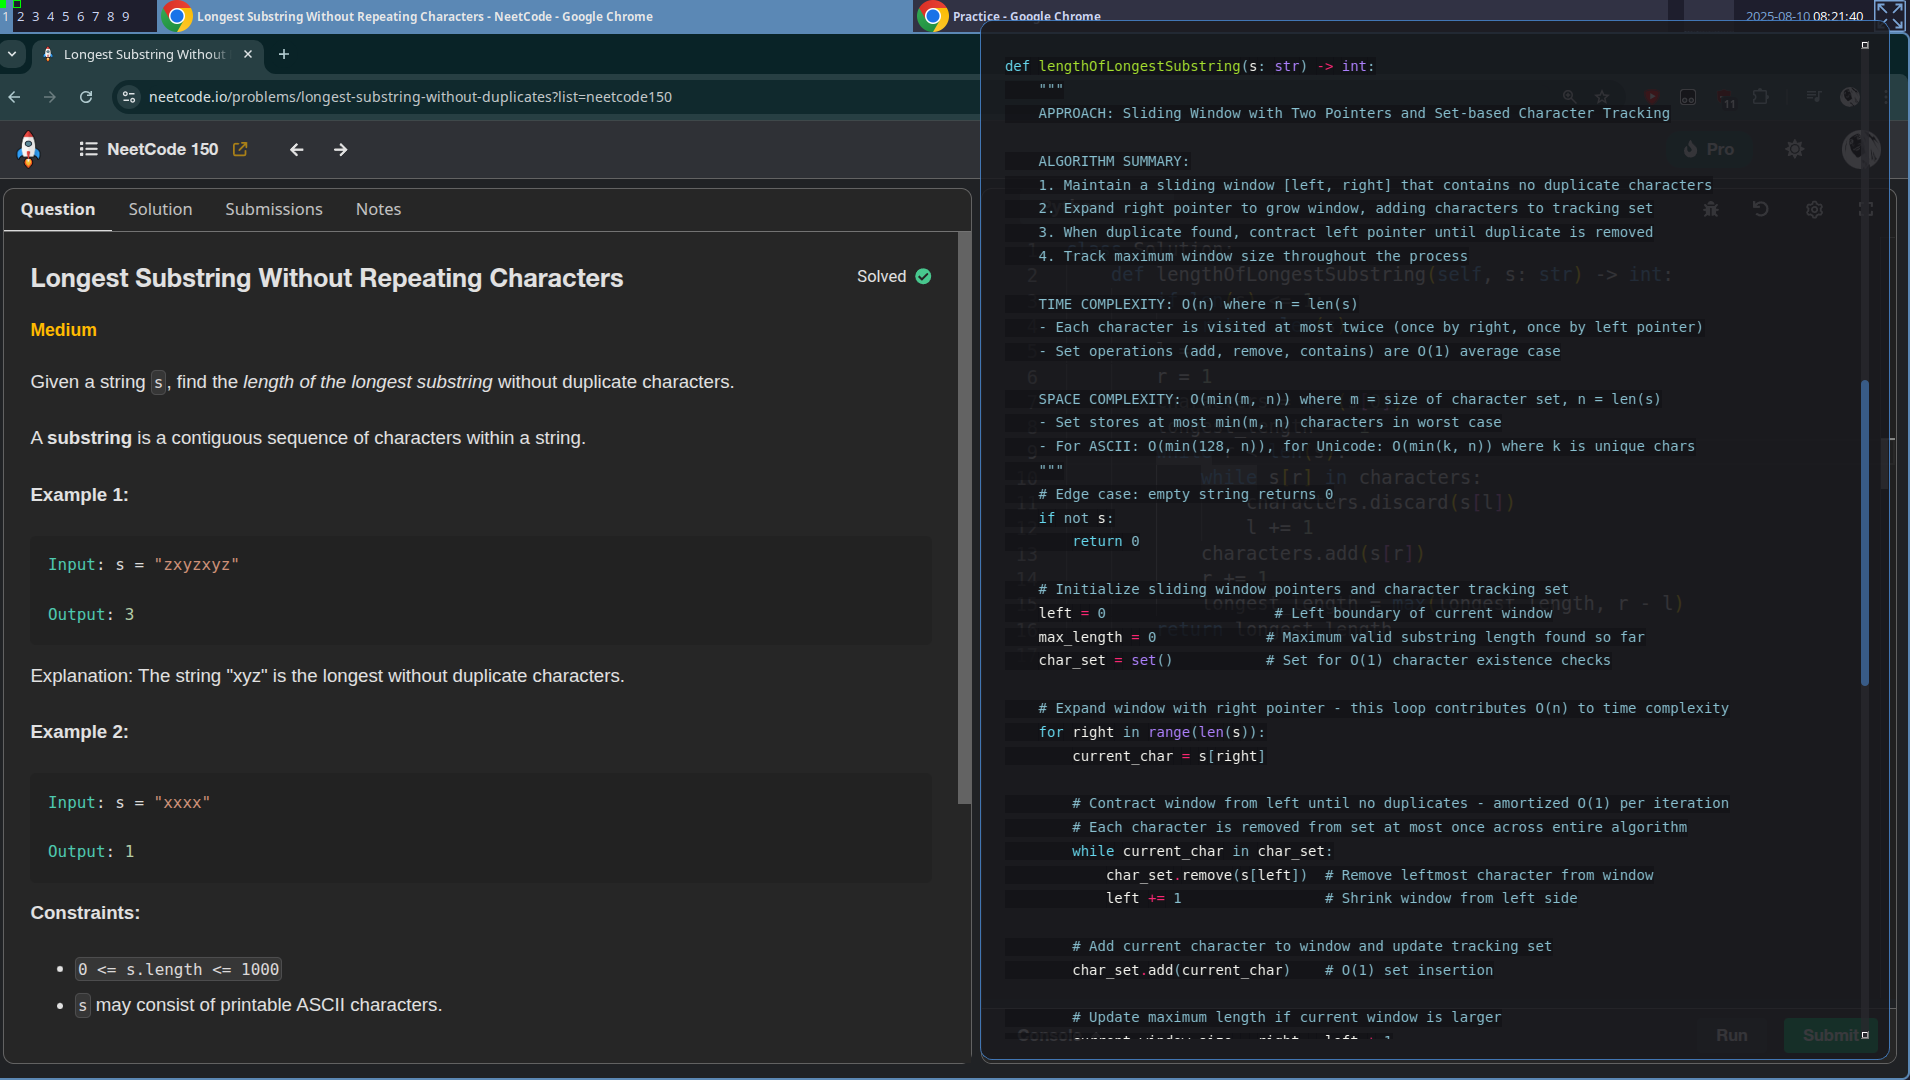
- Personal NeetCode Practice: I wanted a tool to help me with my own NeetCode practice sessions—something that could provide hints and explanations when I got stuck on problems, without having to constantly switch between browser tabs.
As it turns out, the technical implementation took about 2-3 hours with Claude Code's assistance, though most of that time was spent wrestling with Linux display server quirks rather than the core functionality.
The Technical Reality
Building this was a little challenging on Linux with the Awesome window manager.
The Original Inspiration
InterviewCoder markets itself as an undetectable coding assistant that works across platforms like Zoom, HackerRank, and CodeSignal. It boasts features like:
- Invisible operation during screen sharing
- AI-generated solutions and debugging support
- Cross-platform compatibility with major interview platforms
- A "movable screen that follows your eyes"
The tool promises to be a shortcut for developers struggling with technical interviews, offering real-time coding assistance powered by AI.
My Linux Implementation: The Technical Deep Dive
Architecture Overview
My implementation consists of four main components:
- Screenshot Monitor (
screenshot_monitor.py) - The core Python application with PyQt5 overlay - Claude Code CLI Integration - Uses the
claudecommand with specialized sub-agents for AI problem solving - Compositor Setup Scripts - Bash scripts for configuring Picom transparency
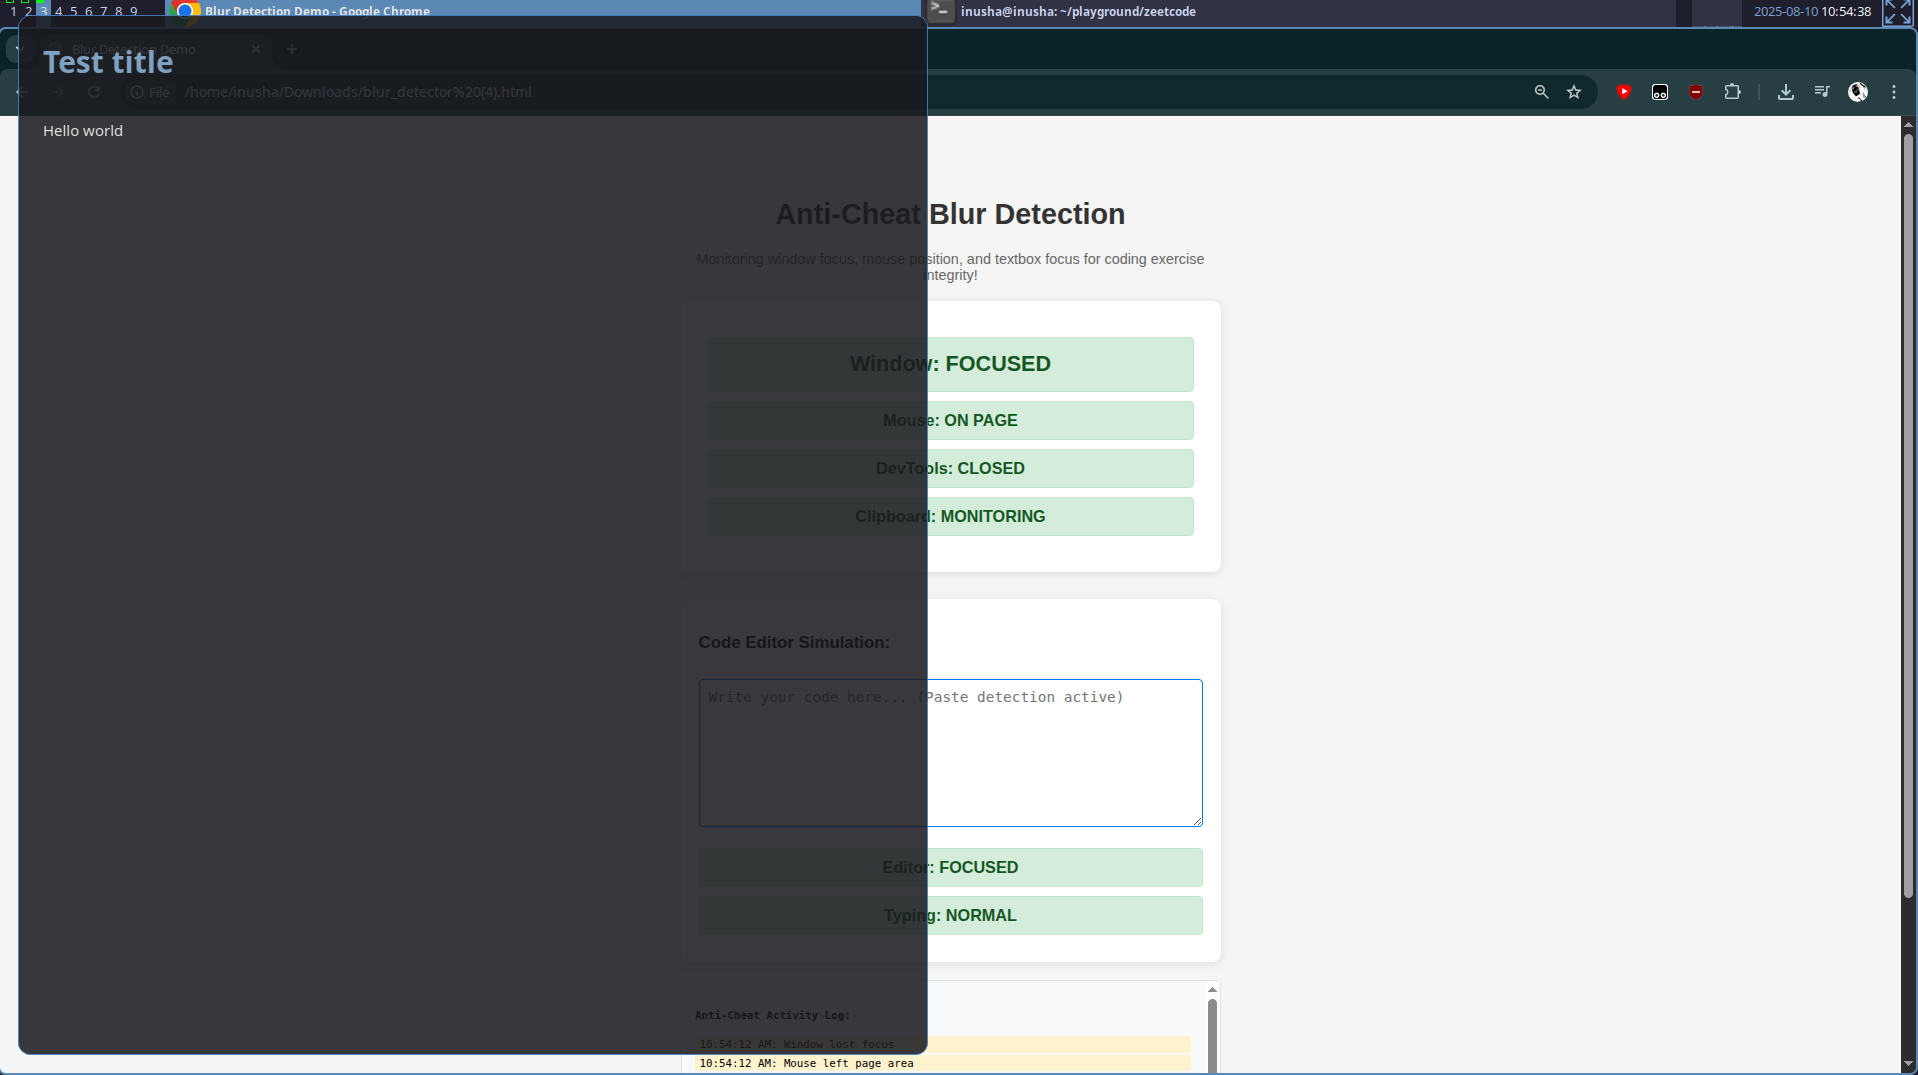
- Anti-Cheat Blur Detector (
blur_detector.html) - Custom solution for detecting window/mouse focus
The system workflow:
- Capture: Take screenshot of current monitor using MSS library
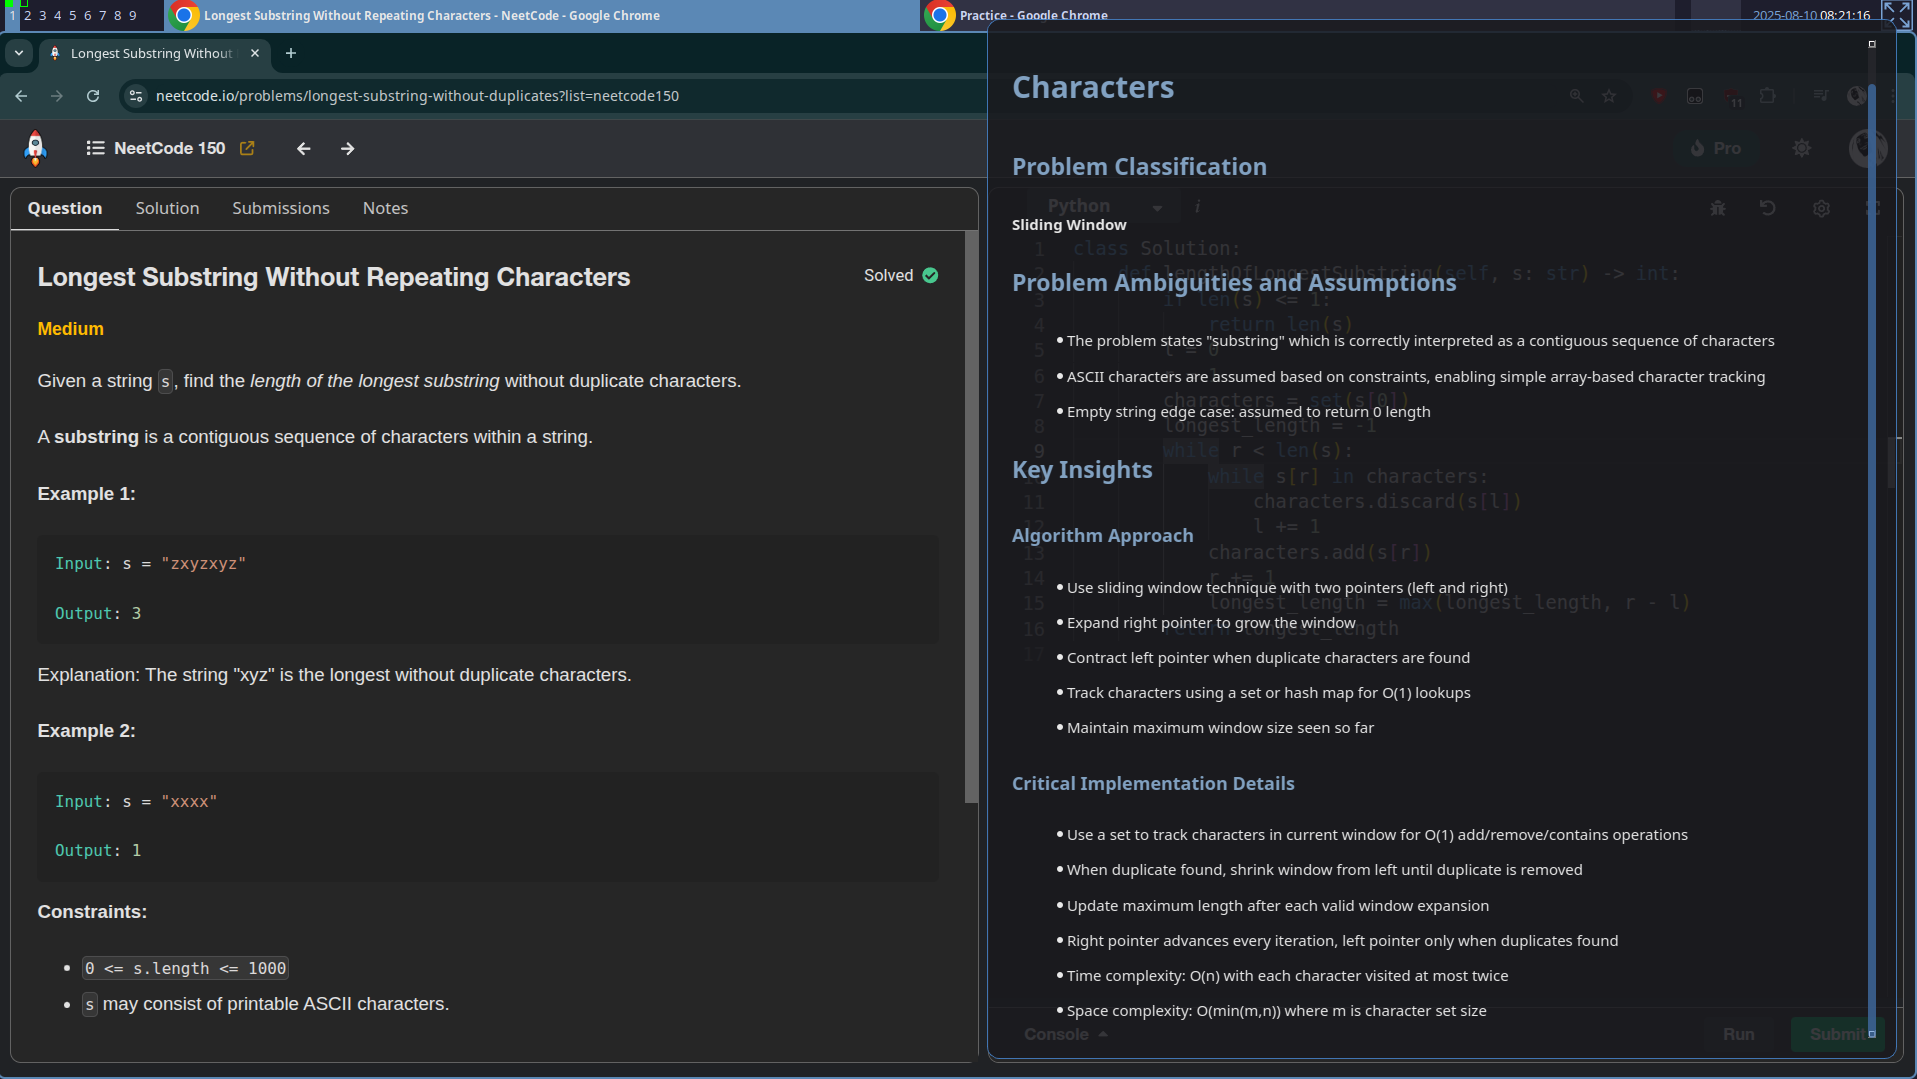
- Analyze: Send screenshot to Claude Code CLI with competitive-programmer sub-agent
- Process: Claude analyzes the coding problem and generates solutions
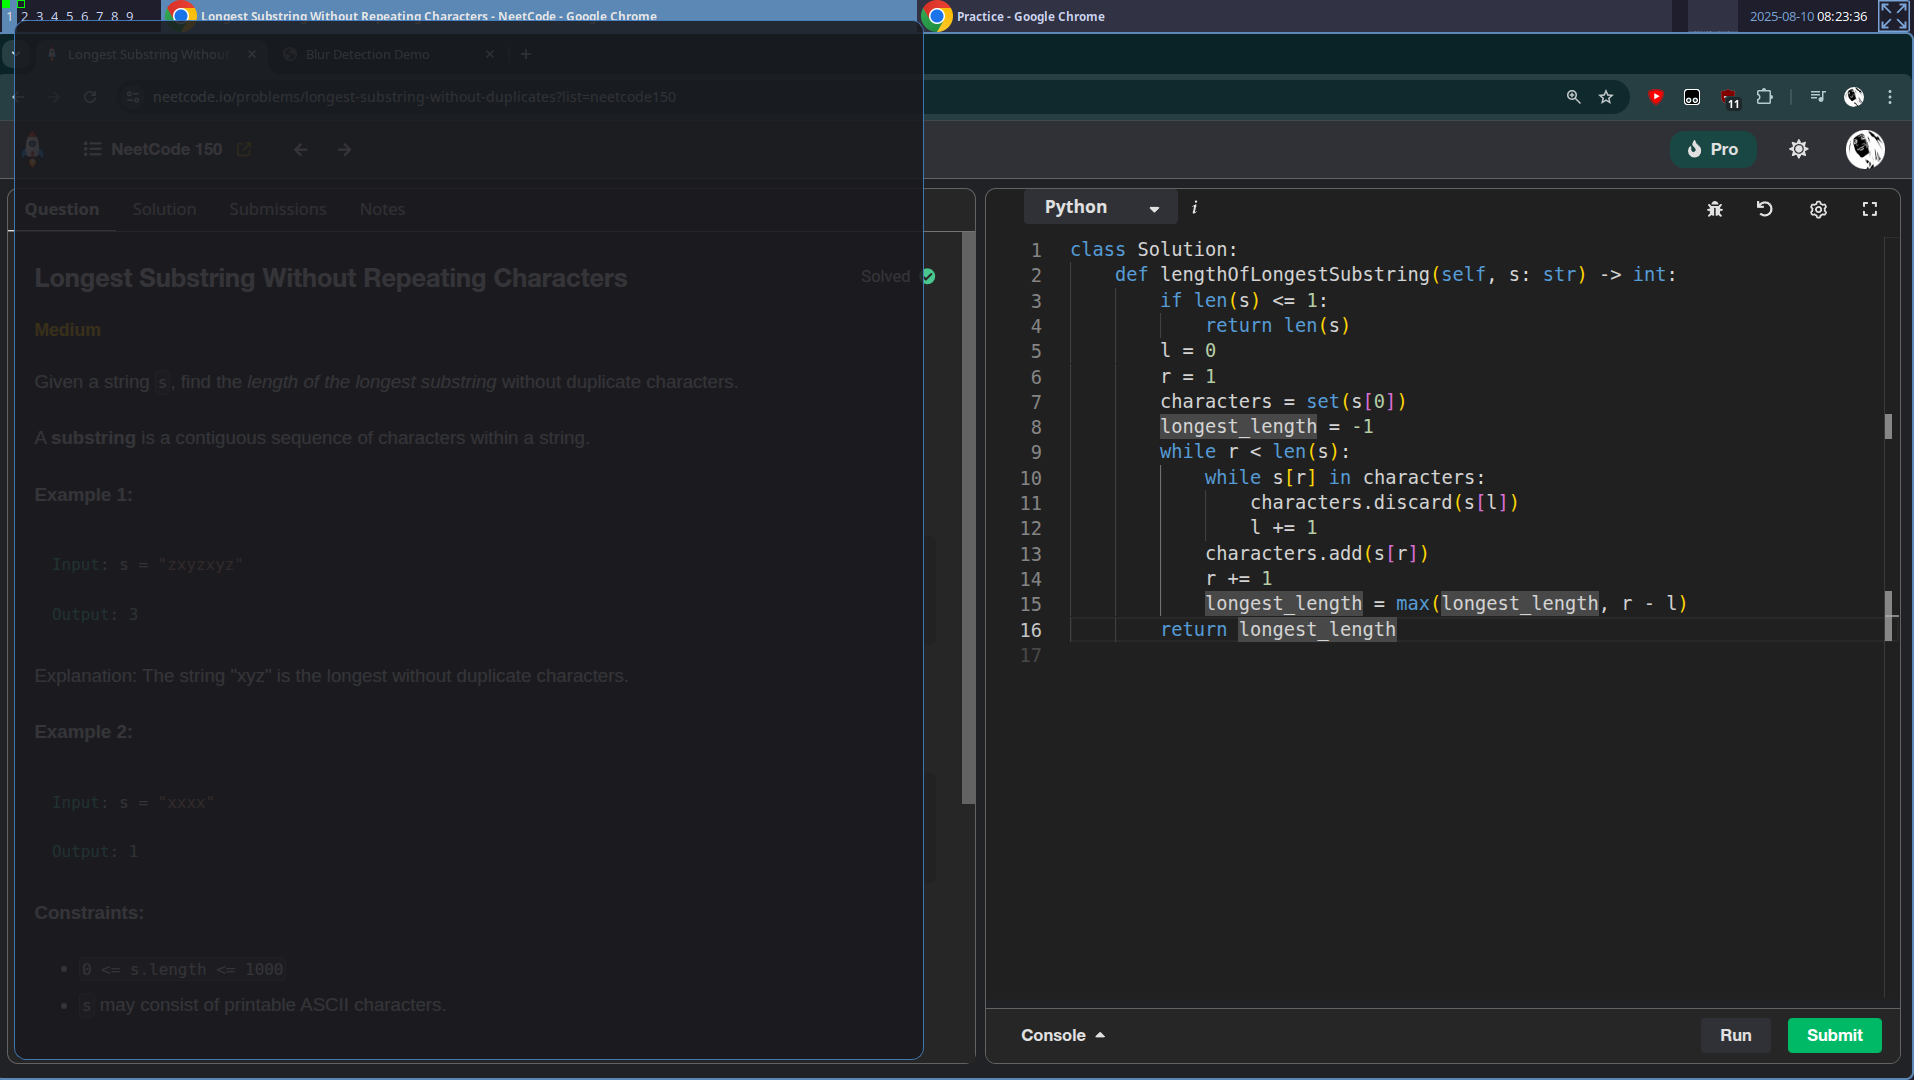
- Display: Real-time updates appear in transparent PyQt5 overlay via file watchers
The Screenshot Monitor: Heart of the System
The main application is built using PyQt5 and integrates several powerful libraries:
import mss
import mss.tools
from pynput import keyboard, mouse
from Xlib import display
from PyQt5.QtCore import QPoint, Qt, QTimer, pyqtSignal, QObject
from PyQt5.QtGui import QBrush, QColor, QFont, QPainter, QPen
from PyQt5.QtWidgets import QApplication, QWidget, QVBoxLayout, QTextEdit
import markdown
from watchdog.observers import Observer
from watchdog.events import FileSystemEventHandler
Key Libraries and Their Roles:
- MSS (Multiple Screen Screenshots): Fast, cross-platform screenshot capture
- PyQt5: GUI framework for creating the transparent overlay
- Xlib: X11 integration for Linux window management
- pynput: Global keyboard and mouse event capture
- watchdog: File system monitoring for real-time updates
- markdown: Rich text rendering for AI responses
The Overlay Challenge: Awesome WM's Transparency Limitations
Creating transparent overlays on Linux proved to be the biggest technical hurdle. The Awesome window manager makes transparent overlays essentially impossible due to its aggressive window management and lack of proper compositor integration—even with window manager bypass flags, transparency simply doesn't work.
The Breakthrough: Picom Compositor
The entire project hinged on one critical discovery: Picom. Without a compositor running, transparent overlays are impossible in Awesome WM. Picom acts as the bridge between the window manager and the graphics system, enabling proper transparency support that Awesome WM lacks natively.
def init_ui(self):
    self.setWindowFlags(
        Qt.WindowStaysOnTopHint |
        Qt.FramelessWindowHint |
        Qt.Tool |
        Qt.WindowTransparentForInput |
        Qt.X11BypassWindowManagerHint
    )

    self.setAttribute(Qt.WA_TranslucentBackground, True)
    self.setAttribute(Qt.WA_ShowWithoutActivating, True)
    self.setAttribute(Qt.WA_NoSystemBackground, True)
Once Picom was properly configured, the PyQt5 overlay could finally achieve:
- Always-on-top behavior
- True transparency support (impossible without Picom)
- Non-intrusive operation (no focus stealing)
- Window manager bypass for proper positioning
Without Picom, this project may have been impossible on Awesome WM.
The Anti-Cheat Solution: Comprehensive Event Listener Network
Since Awesome WM made traditional overlay detection unreliable, I developed a sophisticated HTML-based monitoring system (blur_detector.html) with extensive JavaScript event listeners covering every possible cheating vector:
// Window focus/blur detection
window.addEventListener('focus', function() {
    windowStatus.textContent = 'Window: FOCUSED';
    logActivity('Window regained focus', 'info');
});

window.addEventListener('blur', function() {
    windowStatus.textContent = 'Window: BLURRED';
    logActivity('Window lost focus', 'warning');
});

// Tab visibility monitoring
document.addEventListener('visibilitychange', function() {
    if (document.hidden) {
        logActivity('Tab switched or window minimized', 'warning');
    } else {
        logActivity('Tab became visible again', 'info');
    }
});

// Mouse behavior tracking
document.addEventListener('mouseenter', function() {
    mouseOnPage = true;
    updateMouseStatus();
});

document.addEventListener('mouseleave', function() {
    mouseOnPage = false;
    logActivity('Mouse left page area', 'warning');
});

document.addEventListener('mousemove', function() {
    lastMouseMove = Date.now();
    if (!mouseOnPage) {
        mouseOnPage = true;
        updateMouseStatus();
    }
});

// Clipboard activity monitoring
document.addEventListener('copy', function(e) {
    const copiedText = window.getSelection().toString();
    if (copiedText.length > 10) {
        logActivity(`Large text copied (${copiedText.length} chars)`, 'warning');
    }
});

document.addEventListener('paste', function(e) {
    const pastedText = (e.clipboardData || window.clipboardData).getData('text');
    if (pastedText.length > 20) {
        logActivity(`Large paste detected (${pastedText.length} chars)`, 'critical');
        pasteDetected = true;
    }
});

// Keyboard shortcut interception
document.addEventListener('keydown', function(e) {
    // Alt+Tab, Cmd+Tab, Ctrl+Tab detection
    if ((e.altKey && e.key === 'Tab') ||
        (e.metaKey && e.key === 'Tab') ||
        (e.ctrlKey && e.key === 'Tab')) {
        logActivity('App/tab switching shortcut detected', 'warning');
    }

    // F12 DevTools blocking
    if (e.key === 'F12') {
        e.preventDefault();
        logActivity('F12 (DevTools) key blocked', 'critical');
    }

    // Copy/paste/search shortcuts
    if (e.ctrlKey || e.metaKey) {
        if (e.key === 'v') logActivity('Paste shortcut used', 'warning');
        if (e.key === 'f') logActivity('Find/search shortcut used', 'warning');
    }
});

// Right-click context menu blocking
document.addEventListener('contextmenu', function(e) {
    e.preventDefault();
    logActivity('Right-click blocked', 'warning');
});

// Text selection monitoring
document.addEventListener('selectionchange', function() {
    const selection = window.getSelection().toString();
    if (selection.length > 50) {
        logActivity(`Large text selection (${selection.length} chars)`, 'info');
    }
});

// Page navigation prevention
window.addEventListener('beforeunload', function() {
    logActivity('User attempted to leave page', 'critical');
});

// Window resize detection (DevTools)
window.addEventListener('resize', function() {
    detectDevTools();
});

// Code editor specific monitoring
codeEditor.addEventListener('focus', function() {
    logActivity('Code editor focused', 'info');
});

codeEditor.addEventListener('blur', function() {
    logActivity('Code editor lost focus', 'warning');
});

codeEditor.addEventListener('keydown', function(e) {
    // Keystroke timing analysis for paste detection
    const currentTime = Date.now();
    const timeDiff = currentTime - lastKeyTime;
    keystrokes.push({key: e.key, time: currentTime, interval: timeDiff});
});

codeEditor.addEventListener('input', function(e) {
    // Detect sudden text increases without paste events
    const currentLength = codeEditor.value.length;
    const lengthDiff = currentLength - lastTextLength;
    if (lengthDiff > 30 && e.inputType !== 'insertFromPaste') {
        logActivity(`Sudden text increase (${lengthDiff} chars) without paste`, 'warning');
    }
});
The Complete Monitoring Network:
- 15+ different addEventListener calls covering window, document, and element events
- Real-time activity logging with timestamp and severity levels
- Multi-vector detection combining behavioral, technical, and timing analysis
- Proactive blocking of common cheating shortcuts and developer tools
- Keystroke timing analysis for paste detection through typing patterns
- DevTools detection through window resize monitoring
- Tab switching detection via visibility change events
- Mouse tracking for focus and positioning analysis
AI Integration: Claude Code CLI with Sub-Agents
The system integrates with Anthropic's Claude Code CLI tool, leveraging specialized sub-agents for competitive programming:
def analyze_image_with_claude(self, image_path):
    """Analyze image using Claude CLI with sequential subprocess calls"""
    abs_path = os.path.abspath(image_path)

    # First subprocess call: Problem Analysis
    cmd1 = f'''claude --dangerously-skip-permissions --print --model sonnet "
    Analyze this screenshot: {abs_path}.

    Classify the problem (Array & Hashing, Two Pointers, Sliding Window, Stack,
    Binary Search, Linked List, Trees, Heap, Backtracking, Tries, Graphs, DP,
    Intervals, Math, Bit Manipulation).

    Include key insights (Algorithm approach, Critical Implementation Details)
    "'''

    # Second subprocess call: Solution Generation with Sub-Agent
    cmd2 = '''claude --continue --dangerously-skip-permissions --print --model sonnet "
    Use the competitive-programmer sub agent.

    ## Solution
    Write the simplest solution that is also time efficient.
    Include time complexity analysis and clean, commented code.
    "'''
Key Claude Code CLI Features Used:
claudeCommand: The main CLI interface for interacting with Claude- Competitive-Programmer Sub-Agent: Specialized agent optimized for algorithmic problem-solving
--continueFlag: Maintains context between sequential calls--dangerously-skip-permissions: Bypasses safety checks for automated usage- File Output: Results written to
report.mdfor file watcher integration
The Final Solution Stack
After extensive experimentation, the winning combination was:
- Picom Compositor: The critical enabler - GLX backend with transparency support (without this, transparent overlays are impossible in Awesome WM)
- PyQt5 Overlay: Carefully configured window flags that only work with Picom running
- MSS Library: Fast screenshot capture across multiple monitors
- Claude Code CLI: AI-powered code analysis with competitive-programmer sub-agent
- Custom Blur Detection: HTML/JavaScript-based anti-cheat monitoring
- File Watchers: Real-time response updates without UI blocking
Picom is the foundation that makes everything else possible—without it, Awesome WM simply cannot display transparent windows.
The Ethical Reality Check
While this technical exercise was fascinating, it's crucial to address the elephant in the room: using such tools in actual interviews is fundamentally dishonest and counterproductive.
Why This Shouldn't Be Used in Real Interviews
- Ethical Violation: It's cheating, plain and simple
- Skill Mismatch: You'll get hired for skills you don't actually possess
- Long-term Consequences: The job will expose your actual skill level
- Professional Integrity: Builds a career on false foundations
The Better Alternative: NeetCode
Instead of seeking shortcuts, developers would benefit far more from platforms like NeetCode.io. NeetCode offers:
- Structured Learning: The NeetCode 150 provides a curated path through essential problems
- Video Explanations: Deep understanding rather than memorized solutions
- Pattern Recognition: Learn to identify algorithm patterns, not just specific problems
- Genuine Skill Building: Develops real problem-solving abilities
Technical Takeaways
This project taught several valuable lessons about Linux desktop development:
X11 and Window Management
- Window manager compatibility is crucial for overlay applications
- Compositor configuration significantly impacts transparency and performance
- Multi-monitor support requires careful geometry calculations
Real-Time AI Integration
- File watchers provide elegant solutions for async AI interactions
- Process management is critical when spawning external AI tools
- Response streaming improves user experience over blocking calls
Conclusion
Building a Linux equivalent of InterviewCoder was an excellent exercise in desktop application development, X11 programming, and AI integration. What started as pure curiosity—"can I build this in a few hours with Claude Code?"—turned into a surprisingly comprehensive system that took about 2-3 hours to implement.
The technical challenges—particularly around transparent overlays in Awesome WM—required discovering that transparent overlays are impossible without a compositor. Most of the development time was spent figuring out that Picom was absolutely essential, then wrestling with its configuration rather than the core screenshot and AI integration functionality. Once Picom was properly configured, the rest fell into place quickly.
The Real Value: A Personal Learning Tool
While this tool could theoretically be misused, its genuine value lies in being a personal learning assistant for NeetCode practice. Having an AI-powered overlay that can provide hints, explanations, and alternative approaches when you're genuinely stuck on a problem is incredibly useful for skill development—as long as you're honest about when you need help versus when you can solve it independently.
However, the most important lesson isn't technical: genuine skill development through platforms like NeetCode.io will serve developers far better than any interview assistant tool. The satisfaction of solving problems through your own understanding and hard work is incomparable to any shortcut.
Remember: You'll perform much better by actually learning the patterns and solving NeetCode problems than by trying to cheat your way through interviews. Build real skills, not elaborate cheating mechanisms. Use tools like this to enhance your learning, not to avoid it.
This project was built purely for educational purposes to understand Linux desktop development and AI integration. The techniques described should never be used to cheat in actual interviews. Instead, invest your time in genuine skill development through platforms like NeetCode.io.